Easter Pavlova Wreath
Tue Apr 07 2020
Easter Pavlova Wreath
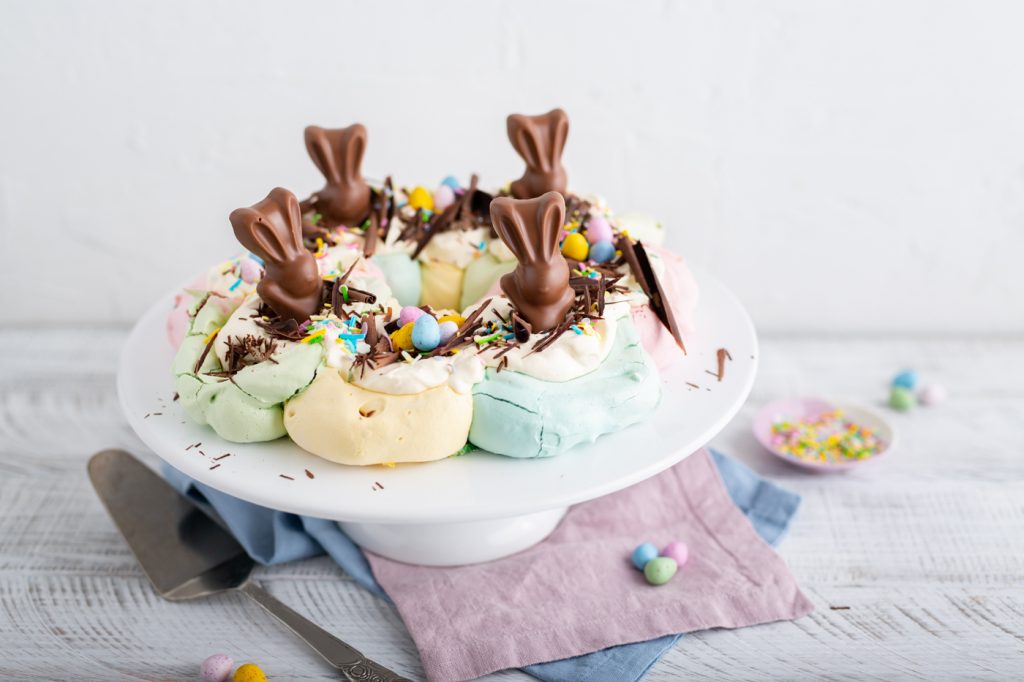
This dessert makes a beautiful centrepiece for Easter. The pretty pastel Pavlova is flavoured with vanilla and has a crunchy shell but a soft and melt-in-the-mouth middle. It’s topped with whipped cream and plenty of chocolate. Perfect for kids and adults, and, it’s naturally gluten free.
For the pavlova:
- 5 large egg whites
- 275g caster sugar
- 2 ½ tsp cornflour (plus extra for dusting)
- 1 ½ tsp white vinegar (cider or wine vinegar)
- 1 tsp vanilla extract
- Gel food colouring (pink, yellow, green & blue)
- To finish
- ½ slab good quality 70% dark chocolate
- 250ml double cream
- Small chocolate bunnies
- Mini chocolate eggs
- Sprinkles
Method:
- Pre-heat oven to 120°C / 100°C fan assisted.
- On the back of a large piece of parchment paper, trace a 20cm (8inch) circle using a cake tin or plate as a guide. Flip the parchment paper over and place on a large flat baking tray. Set aside.
- Pour egg whites into a large mixing bowl. Using an electric hand mixer or stand mixer with the whisk attachment, start whisking the egg whites on a medium low speed. When they start to get frothy, slowly add the caster sugar, 1 tablespoon at a time.
- Once all of the sugar has been added, increase speed to high and whisk until meringue is thick and glossy. Check to see that the sugar has been dissolved by rubbing a little bit of meringue between your fingers to feel for granules. If it’s still a little rough, continue whisking.
- Add the cornflour, vinegar and vanilla, whisk in on high speed.
- Divide the meringue evenly into four separate bowls. Use a fork or small whisk to mix in gel food colouring, one each of yellow, pink, blue and green. (The amount of colouring used will depend on the brand you’re using, so it’s best to add a small amount to get a feel for the strength of the colour, then add more). Tip: Scrape the sides of the bowls as needed with a spatula, but try to avoid deflating the meringue by pressing down on the meringue with the spatula. This is why using a fork or small whisk is best to mix in the colour and not a spoon.
- Once the meringue has been coloured to your liking, stick down the parchment paper to the baking tray by smearing a small bit of meringue in each corner.
- Generously dust cornflour on the parchment following the traced circle as a guide.
- Using 2 spoons, drop half of the blue meringue on one side of the circle, using the one spoon to scrape the meringue off the other, then drop the remaining blue meringue directly opposite it on the other side of the circle.
- Do the same with the remaining colours going around the circle, either using new spoons or cleaning and drying the ones you already used, until you have a ring of meringue dollops, each colour opposite the same colour. Tip: It helps to think of North & South as blue, West & East as green, NW & SE as pink, NE & SW as yellow.
- Use the back of a clean spoon to lightly press down on each meringue dollop and form a little shallow bowl. Tip: All the colours should now be touching the colour next to them, forming a closed circle.
- Bake meringue in pre-heated oven for 1 hour 30 minutes. Do not open the oven door while baking!
- When the baking time is up, turn off the oven and leave meringue inside to gently cool. You can prop the oven door open slightly by using a wooden spoon to keep the door slightly ajar. Leave for at least 1 hour.
- When it’s time to decorate, prepare the chocolate shavings. Place the chocolate on a small plate with the back (the smooth side) facing up. Microwave it for 10-20 seconds just to soften it slightly, but not to melt it.
- Place chocolate on a cutting board, still with the smooth side facing up, and use a sharp straight-edged knife to shave long curled shavings. Carefully place the shavings on a cool board or plate and set aside until needed. Tip: You won’t need to shave all of the chocolate, just enough to generously sprinkle on the cream. Keep the extra chocolate for future baking. Or snacking!
- Place double cream in a large jug or bowl and whip until medium stiff peaks. Tip: To make this dessert even more delicious, you can add a few drops of orange blossom, orange or lemon extract to the cream.
- Very carefully transfer the baked pavlova to a serving plate. First, run a large sharp knife under the meringue to loosen from the parchment paper. It will be soft and sticky on the underside of the meringue, so clean the knife from time to time until you’ve worked your way around and it’s free from the parchment. Then, gently slide it onto a serving dish.
- Drop dollops of the whipped cream evenly on top of the meringue, then use the back of a spoon to lightly spread it around.
- Scatter chocolate shavings on top of the whipped cream then decorate with chocolate bunnies and mini eggs. Finally, decorate with coloured sprinkles.
- Once topped with cream Pavlova doesn’t keep well as any moisture will start to dissolve the meringue, so serve within about an hour of assembling.
- Keep leftovers in the fridge in an airtight container for up to a day. You may find that a bit of sweet syrup seeps from the meringue, this is normal and still safe to eat.
