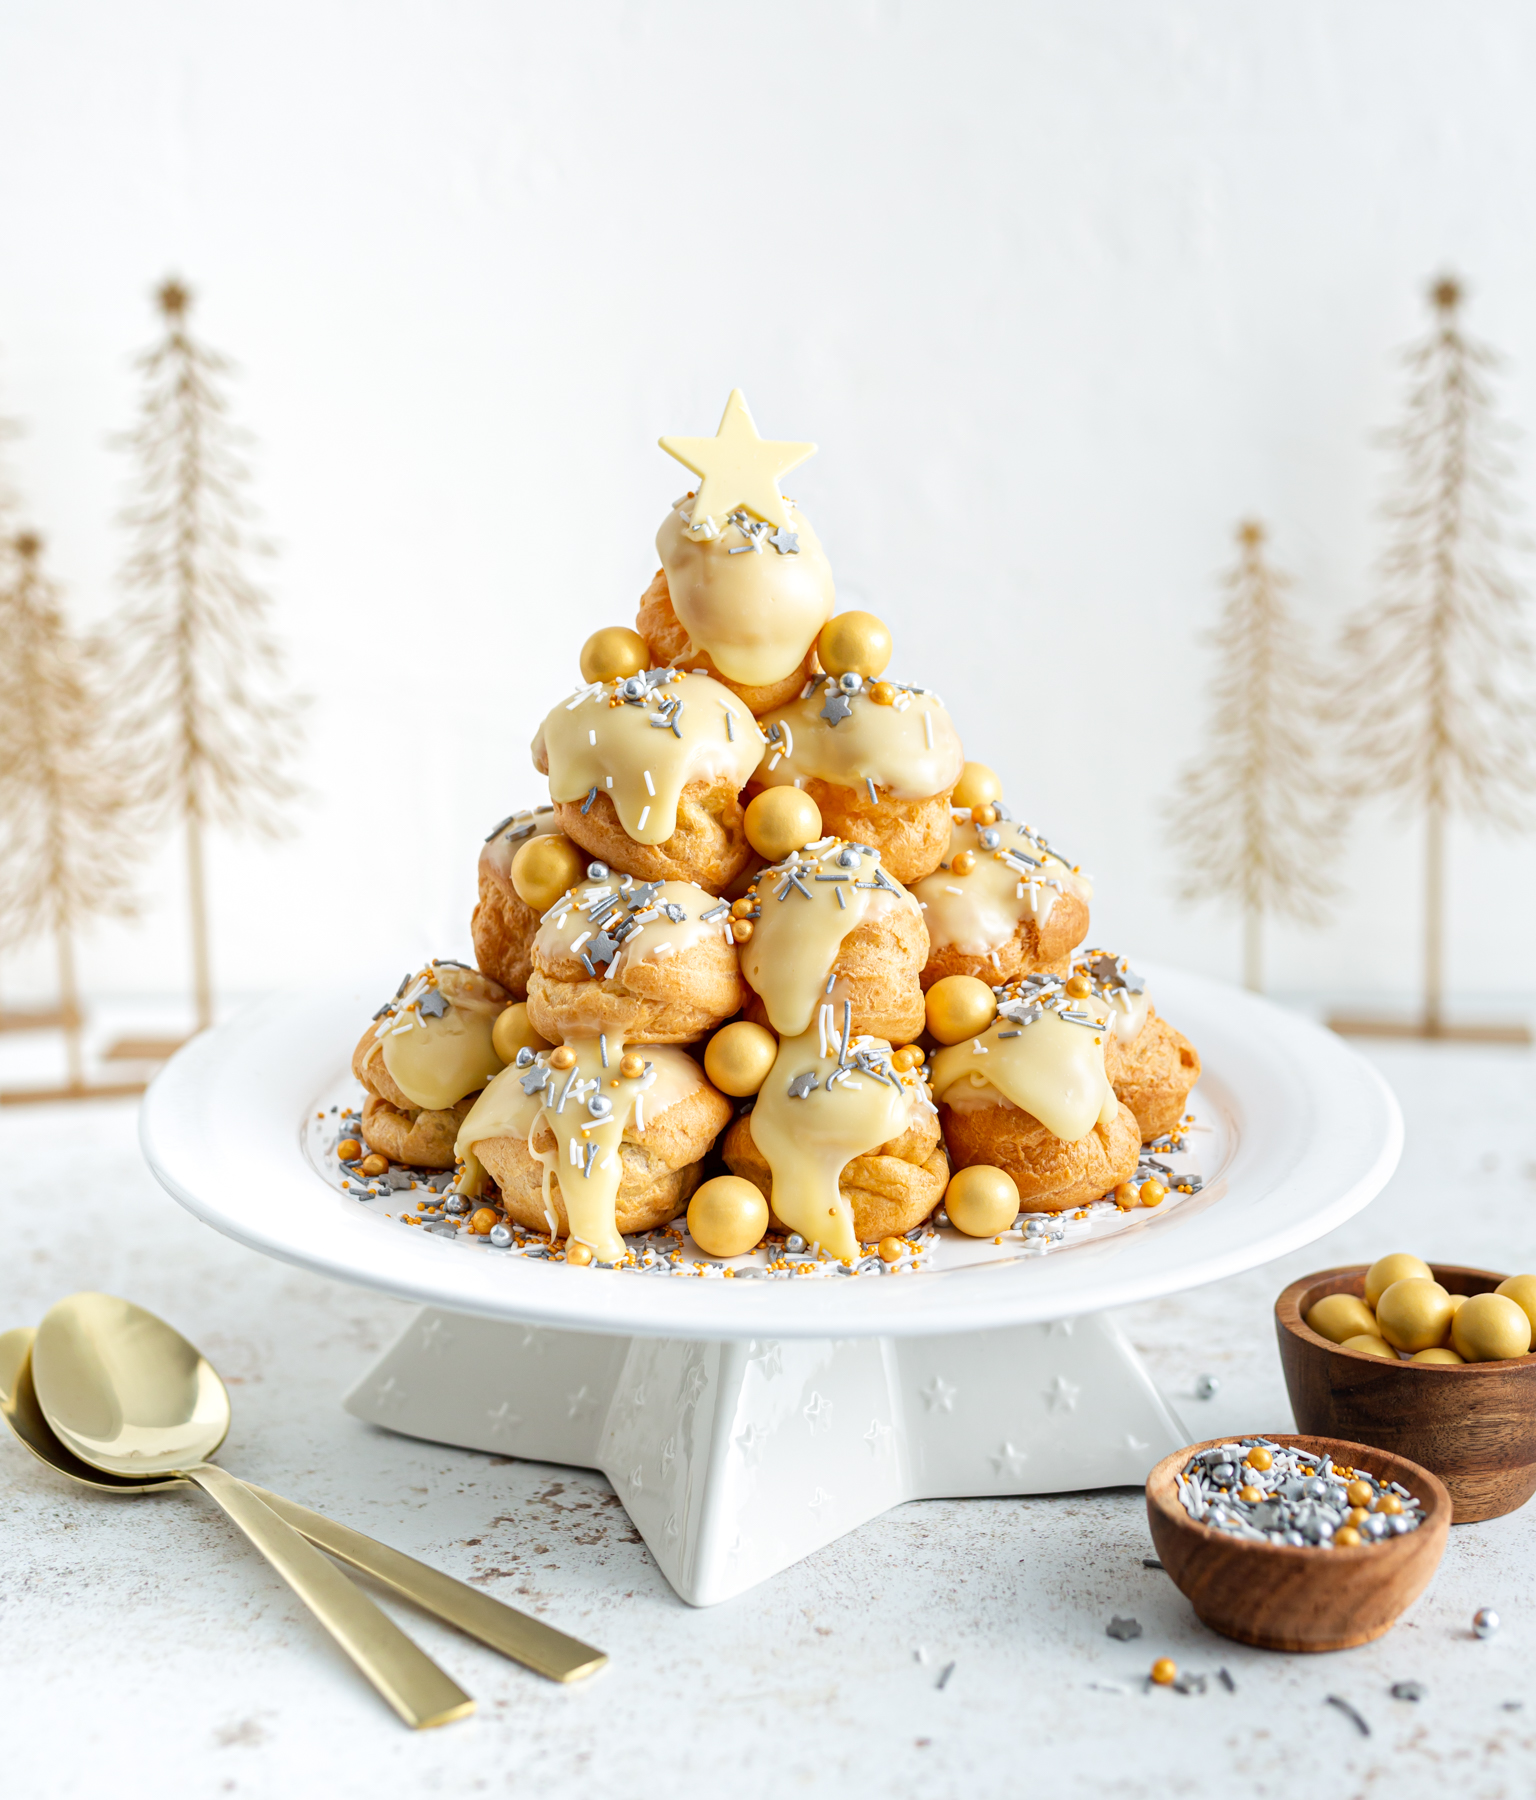
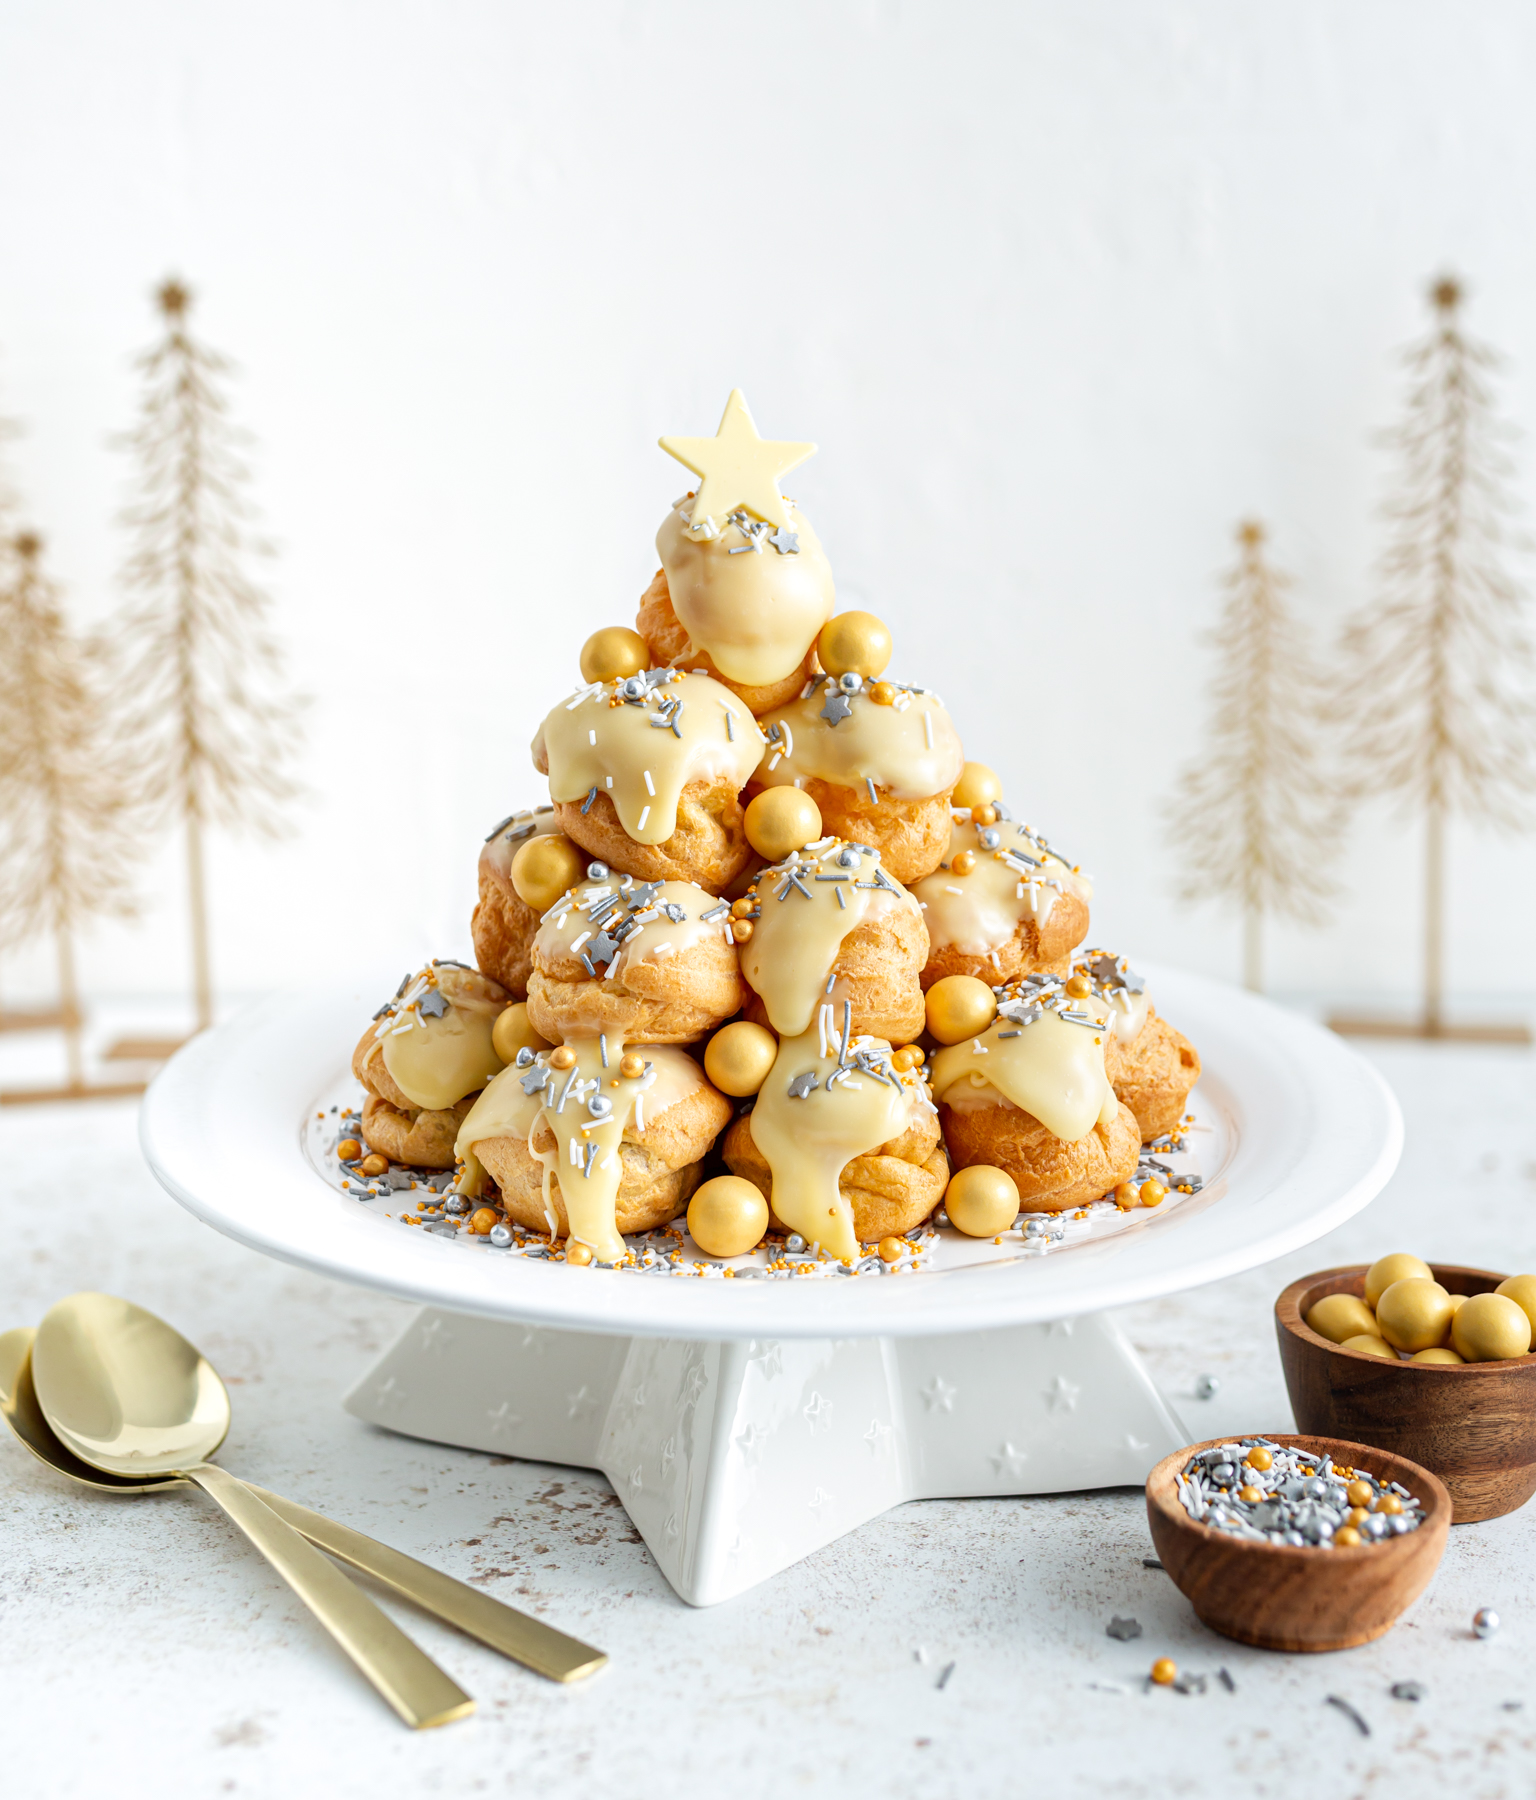
Festive Golden Profiterole Tree This beautiful showstopper is made with creamy chocolate-filled profiteroles topped with white chocolate glaze, sprinkled with a bit of festive magic (sprinkles!) and then assembled as a decadent golden Christmas tree. The components can be made ahead and then the dessert is assembled on the day. We hope you fall in love with the silky-smooth chocolate filling (introduced to our recipe editor by pastry wizard Aoife Noonan) and is called Namelaka. Although very similar to a milk chocolate ganache, the addition of milk and gelatine (or vegetarian equivalent) does something amazing and the texture becomes incredibly silky, and somehow, for something made with cream and chocolate, is incredibly light. The perfect way to end a festive feast.
Introduction
Festive Golden Profiterole Tree This beautiful showstopper is made with creamy chocolate-filled profiteroles topped with white chocolate glaze, sprinkled with a bit of festive magic (sprinkles!) and then assembled as a decadent golden Christmas tree. The components can be made ahead and then the
Ingredients
- 3 leaves gelatine (or vegetarian equivalent)
- 150ml milk
- 300g good quality milk chocolate, roughly chopped
- 300ml fresh cream
- 200ml water
- 85g unsalted butter
- 1 tsp caster sugar
- 115g plain flour
- Pinch of salt
- 3 large eggs, lightly beaten
- 200g white chocolate, roughly chopped
- 4 tbsp fresh cream
- Festive sprinkles (gold, silver, white)
FOR THE CHOCOLATE NAMELAKA FILLING:
FOR THE CHOUX PASTRY:
FOR THE WHITE CHOCOLATE GLAZE:
TO DECORATE:
Method
- 1. For the Namelaka, place the gelatine leaves in a bowl with cold water, make sure they’re fully submerged, and leave to soak. (If using a vegetarian alternative, follow the instructions on the packaging.)
- 2. Bring milk to a simmer in a small saucepan over medium heat.
- 3. While milk is heating melt the chocolate either in the microwave (in short 15-20 seconds intervals, stirring in between) or in a bowl set over a pot of steaming water.
- 4. When milk has started bubbling, remove from heat. Remove gelatine leaves from the water and squeeze firmly to remove excess liquid. Add gelatine to the milk and stir with a whisk until completely dissolved.
- 5. Pour the milk over the melted chocolate and stir well until smooth.
- 6. Finally, stir in the cream.
- 7. Cover the bowl with a lid or clingfilm and refrigerate to set, at least 1 hour.
- 8. For the profiteroles, pre-heat oven to 200°C / 180°C fan assisted / gas 6. Line 2 large baking sheets with parchment paper.
- 9. Combine the water, butter and sugar in a large saucepan and heat ingredients over low heat until butter has melted. Once melted, increase heat and bring to a boil. Tip: It’s important to melt the butter over low heat so that you don’t lose too much water from evaporation as this will affect the ratios in the dough, so don’t be tempted to speed up the process by increasing the heat.
- 10. Turn off the heat and add the flour and salt. Beat vigorously with a wooden spoon until the mixture starts to come away from the side of the pan. Transfer mixture to a large bowl and leave to cool for about 15 minutes.
- 11. Gradually beat in the eggs (this can be done by hand but is easier with a hand-held or stand mixer), making sure to thoroughly mix after each addition, until the mixture is smooth and glossy. Tip: You may not need to add all of the egg. The mixture is at the right consistency when it will fall reluctantly from the spoon when given a sharp jerk and it leaves a “v” shape hanging from the spoon.
- 12. Spoon the batter into a piping bag fitted with a large plain piping tip.
- 13. Pipe 15 neat balls onto each prepared baking sheet, about the size of a whole walnut, making sure to leave plenty of space between them. Alternatively, you can use 2 wet spoons to drop balls of the mixture onto the baking sheet.
- 14. Use a wet fingertip to flatten and smooth any peaks.
- 15. Bake for 18-20 minutes until well puffed and golden brown.
- 16. Remove from the oven and use a skewer to poke a hole in the bottom of each choux bun to allow steam to escape (they’ll be hot so use a clean dish towel to help handle them). Place buns back on to the baking sheet, hole side up, and return to the oven for 5-8 minutes.
- 17. Remove from the oven and leave to cool completely before filling.
- 18. For the white chocolate glaze, place the chocolate and cream in a small saucepan and melt together over low heat, stirring occasionally. Alternatively, heat together in the microwave in 20-30 second intervals, stirring between, until smooth. Set aside at room temperature for assembly.
- 19. To assemble, give the Namelaka a stir and then spoon into a piping bag fitted with a small plain piping tip.
- 20. Fill each choux bun with the Namelaka through the small piercing made earlier when baking.
- 21. Once all the choux buns are filled, start the assembly. Dip the tops of 6 of the filled choux buns in the white chocolate glaze (reheat if it cools and thickens too much) and arrange in a solid triangle of 3 rows (3 buns on the first row, then 2, then 1) on a serving dish. Tip: Make sure the buns are nestled close together. Dip another 6 and place 2 on each side of the triangle, fitted into the gaps, so you now have a triangle without the pointed ends. Decorate with sprinkles while the glaze is still tacky.
- 22. The next layer will be 7 choux buns, again, dip each with in the glaze. Place one directly in the middle then surround it by 6 buns like a flower. Decorate with sprinkles.
- 23. The next layer will be 3 buns, dipped and sprinkled, and finally, place the last one on top to finish the tree shape, dipped and sprinkled.
- 24. You can add to the Christmas tree theme by decorating with large edible balls (we found gold ones in the baking aisle) or small truffles, even gold leaf or edible glitter. You can finish off the look with a chocolate star on top.
- 25. Serve & enjoy!
- 26. Tip: The Namelaka can be made a few days ahead of time. Keep covered and in the fridge.
- 27. Tip: Choux buns can be made a few days ahead and stored in an airtight container, then simply crisped up again by popping into the oven at 200°C / 180°C fan / gas 6 for about 5 minutes. Cool before filling.Alternatively, you can freeze them for up to a month ahead. Keep them in sealable freezer bags, then when needed, arrange on a baking tray and bake from frozen at 200°C / 180°C fan / gas 6 for about 5 minutes. Cool before filling.
- 28. Not everyone is a chocolate fan, so you could also fill half of the choux buns with the Namelaka and the other half with lightly sweetened whipped cream. Use different sprinkles on the different fillings so you know which is which when serving.
