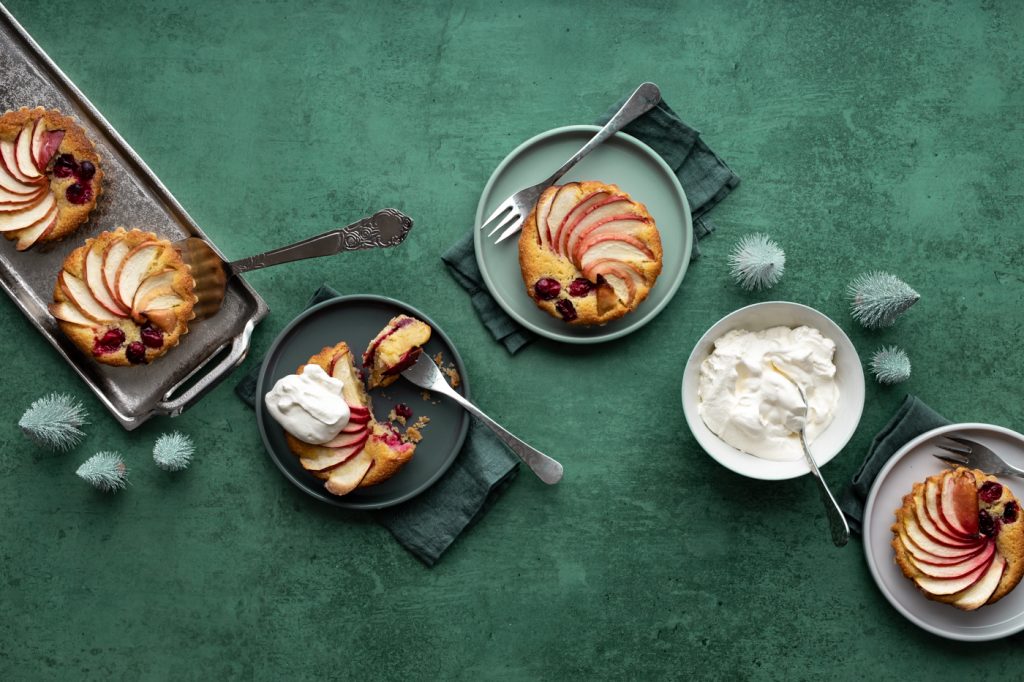
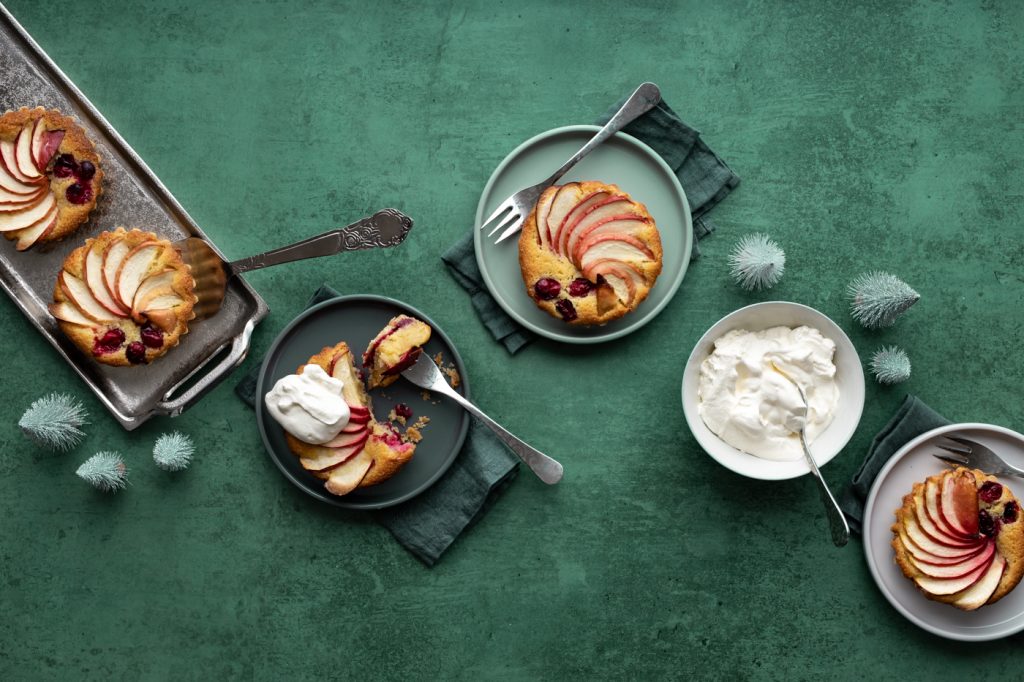
Apple & Cranberry Frangipane Tartlets. We love finding ways of using fresh cranberries when they start appearing on the shelves. This recipe marries these tart little red gems with sweet apples and fragrant almond. There’s a layer of cranberry & apple jam hidden underneath the buttery frangipane, which is then adorned with a fan of apple slices and punctuated with a few more cranberries. This recipe makes 8 and they can be frozen once baked so you can squirrel a few away for another day. Serve warm with a dollop of whipped cream, or even better, a generous pouring of custard. Delicious!
Introduction
Apple & Cranberry Frangipane Tartlets. We love finding ways of using fresh cranberries when they start appearing on the shelves. This recipe marries these tart little red gems with sweet apples and fragrant almond. There’s a layer of cranberry & apple jam hidden underneath the buttery fra
Ingredients
- 200g fresh cranberries, rinsed
- 100g sugar
- 1 red eating apple, peeled, cored & diced
- Juice from ½ lemon
- 200g plain flour
- 100g unsalted butter, chilled and cubed
- 2 tbsp icing sugar
- Pinch of salt
- 2-3 tbsp ice cold water
- 125g butter, softened
- 125g caster sugar
- 2 large eggs
- ¾ tsp almond extract
- 125g ground almonds
- 2 red eating apples, washed
- Handful fresh cranberries, rinsed
FOR THE JAM:
FOR THE SHORTCRUST:
FOR THE FILLING:
Method
- 1. For the jam, place all ingredients in a medium sized saucepan, give it a quick mix then bring to a simmer over medium heat.
- 2. Reduce heat to medium-low, so that it’s simmering very gently, then cook for 1 hour with the lid mostly covering the pot. Stir from time to time to make sure the bottom doesn’t burn.
- 3. Once cooked, remove from heat and leave to cool for about 15-20 minutes. Once cooled slightly, use a stick blender to purée the jam then set aside and leave to cool completely. The jam can be made 1-2 days ahead, store in a clean container or jam jar at room temperature.
- 4. For the crust, place all ingredients except water into the bowl of a food processor then pulse until it resembles breadcrumbs with varying sizes of butter pieces, the largest the size of peas.
- 5. Add 2 Tbsp ice water and pulse a few times. To test if it needs more water, squeeze dough between your fingers. If it holds together, it’s ready. If it crumbles, add the last 1 Tbsp water and pulse again.
- 6. If making by hand, simply rub the butter into the dry ingredients with your fingertips. Stir in 2 Tbsp of the water with a dull knife. Add another 1 Tbsp water if dough does not hold together when squeezed between your fingertips.
- 7. Tip out onto a lightly floured surface and gently bring together by squeezing the dough together and avoiding heavy kneading. Form a large disc then wrap in clingfilm and refrigerate for at least 1 hour.
- 8. Remove chilled pastry from the fridge then gently roll it out with a rolling pin in a long rectangle to about 3mm thick so that it is large enough to line 8 (9x2cm) loose-bottomed mini tart tins. Make sure to keep the pastry moving so that it doesn’t stick. Dust off excess flour then cut pastry into 8 pieces. Press pastry into each mini tart tin leaving the excess to hang over the sides. Use a fork to prick the surface of the pastry.
- 9. Place pastry-lined tins in the fridge and leave to chill for 1 hour. Tip: Letting the pastry chill lets the gluten relax so there is less chance of the pastry shrinking while baking.
- 10. When ready to bake, preheat oven to 200°C / 180°C fan / gas 5.
- 11. Remove pastry-lined tins from the fridge or freezer and place on a large baking tray.
- 12. Line each one with well crumpled pieces of parchment paper and fill with baking beads or dried beans/rice.
- 13. Place in pre-heated oven on the baking tray and bake blind for 10 minutes.
- 14. Remove from oven and remove parchment with baking beads. Trim away excess pastry to the top of the tin with a sharp knife. Use smooth singular motions and not sawing ones. Tip: Don’t worry if a few crumbs fall into the case, they’ll be easy to brush out once fully baked.
- 15. Once excess has been trimmed, return to the oven and bake for another 7 minutes.
- 16. Remove from oven and leave to cool completely in tart tins on a wire rack.
- 17. For the frangipane, add butter, sugar, eggs and almond extract in the bowl of your food processor and blend until smooth. Add the ground almonds and pulse until blended through. Alternatively, mix together with an electric mixer.
- 18. Pre-heat oven to 180°C / 160°C fan / gas 4.
- 19. To assemble, give the cranberry jam a good stir to loosen it, then spread a generous teaspoon full over the base of each pastry shell. (Refrigerate any leftover jam to enjoy on toast or with porridge.)
- 20. Pipe or spoon the frangipane on top of the jam layer then smooth the top with a small palette knife or spatula.
- 21. Remove the cores from the apples then cut each apple into 4 wedges. Thinly slice each wedge with a sharp knife. Taking one of the sliced wedges, fan it out in your hands then place on top of a tart, very lightly pressing it into the frangipane. Add 2 or 3 cranberries to finish. Repeat until all the tartlets have both apple and cranberries.
- 22. Arrange tartlets on 2 baking trays then bake in pre-heated oven for 28-30 minutes. The frangipane will puff up while baking then will settle down once cooled.
- 23. Leave to cool in tart tins on a wire rack. They can be removed when they’re cool enough to handle.
- 24. Serve still warm with a dollop of whipped cream or custard, or leave to cool completely before enjoying.
- 25. Keep at room temperature in a sealed container for up to 3 days, or in the fridge for up to 5 days. They can also be frozen for up to 3 months, simply place completely cold tartlets in sealable freezer bags. Leave to thaw at room temperature or heat in the oven at 180°C / 160°C fan / gas 4 for 3-5 minutes.
